Table des Matières
Sync Employees with ERP #
The system allows us to add specialization or job position for users through the Human Resources system on the main platform, using the system administrator’s account. Follow the coming steps:
- Log in through the main login page to the system administrator’s account.
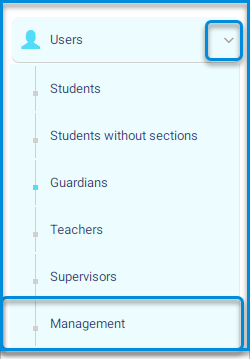
- Click on the user’s drop-down menu from the sidebar.
- Click on the management button to navigate to the user management screen and its contents.
- The system moves to the management homepage containing various tabs:
- Add user.
- Sync Employees with ERP.
- Job title settings.
- Staff’s ID List.
- It contains a user data table and their search engines, searchable by ID number, username, or login name.
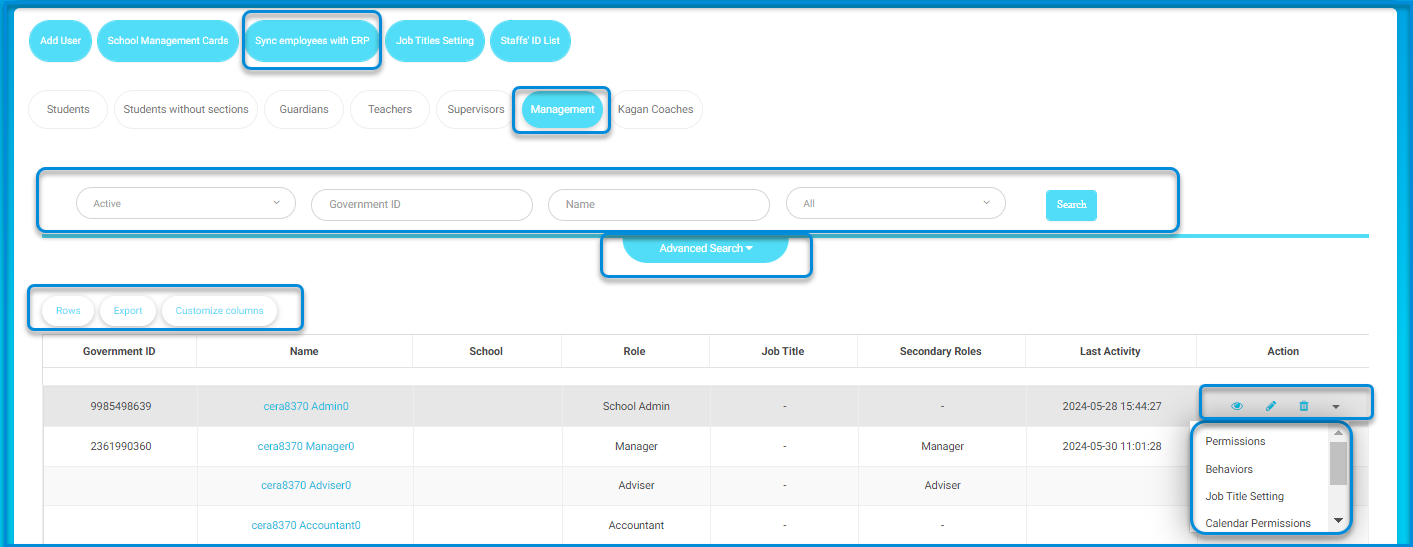
- Click on the sync employees with the ERP button to confirm the synchronization process.
- A message confirming the synchronization with the ERP system will appear.
Roles Job Titles #
Click on the job title settings button.
The system navigates to the job title changes screen.
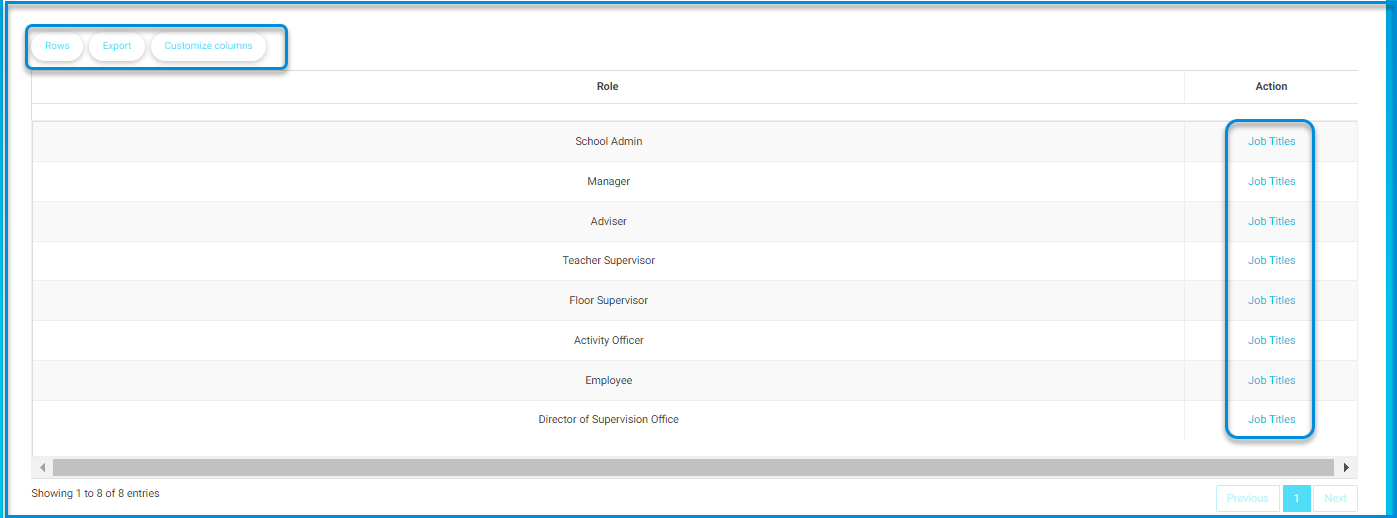
- Click on the job title button next to the job title you want to change.
- The other job title is selected based on the permissions available to the user.

Note: You can add a job title specific to the user according to the country or job from the Add Job Title button.
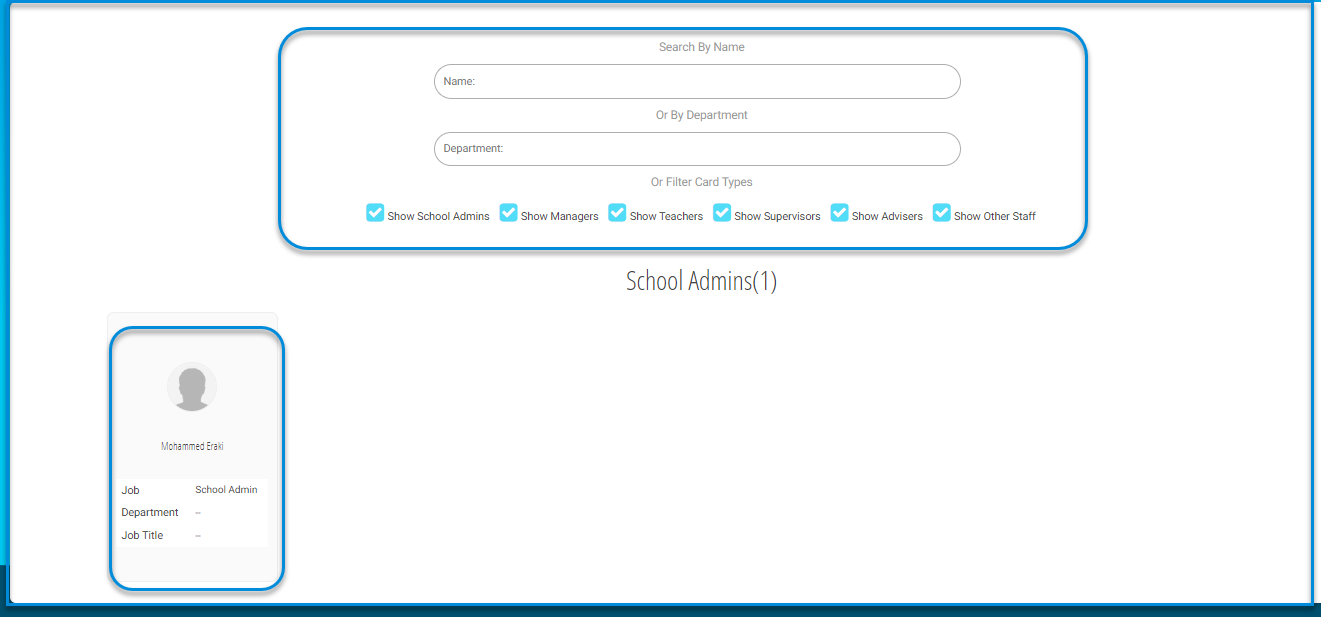
Staffs’ Cards #
- Click on the Staff’s ID List button from the main management screen.
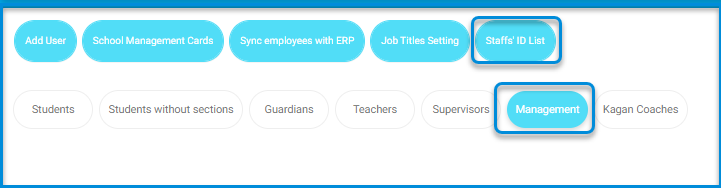
- The system moves to a screen containing ID for administrative users on the platform, such as system administrators, school administrators, teachers, etc., and you can search by username or department through the search engines.
- Administrative user settings in the ERP system:
- Return to the main administration screen containing a table of administrative user data.
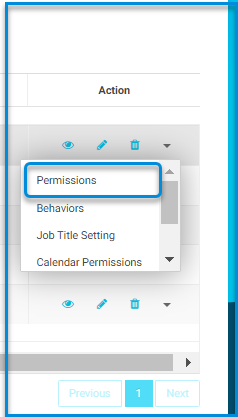
- Click on the dropdown menu for each user containing some settings:
- Permissions.
- Behavior.
- Calendar Permission.
- Job title settings.
- Linked accounts.
- Account Changed Log.
- Click on the permissions button.
- Click on the permissions to be assigned to the user next to the main job.
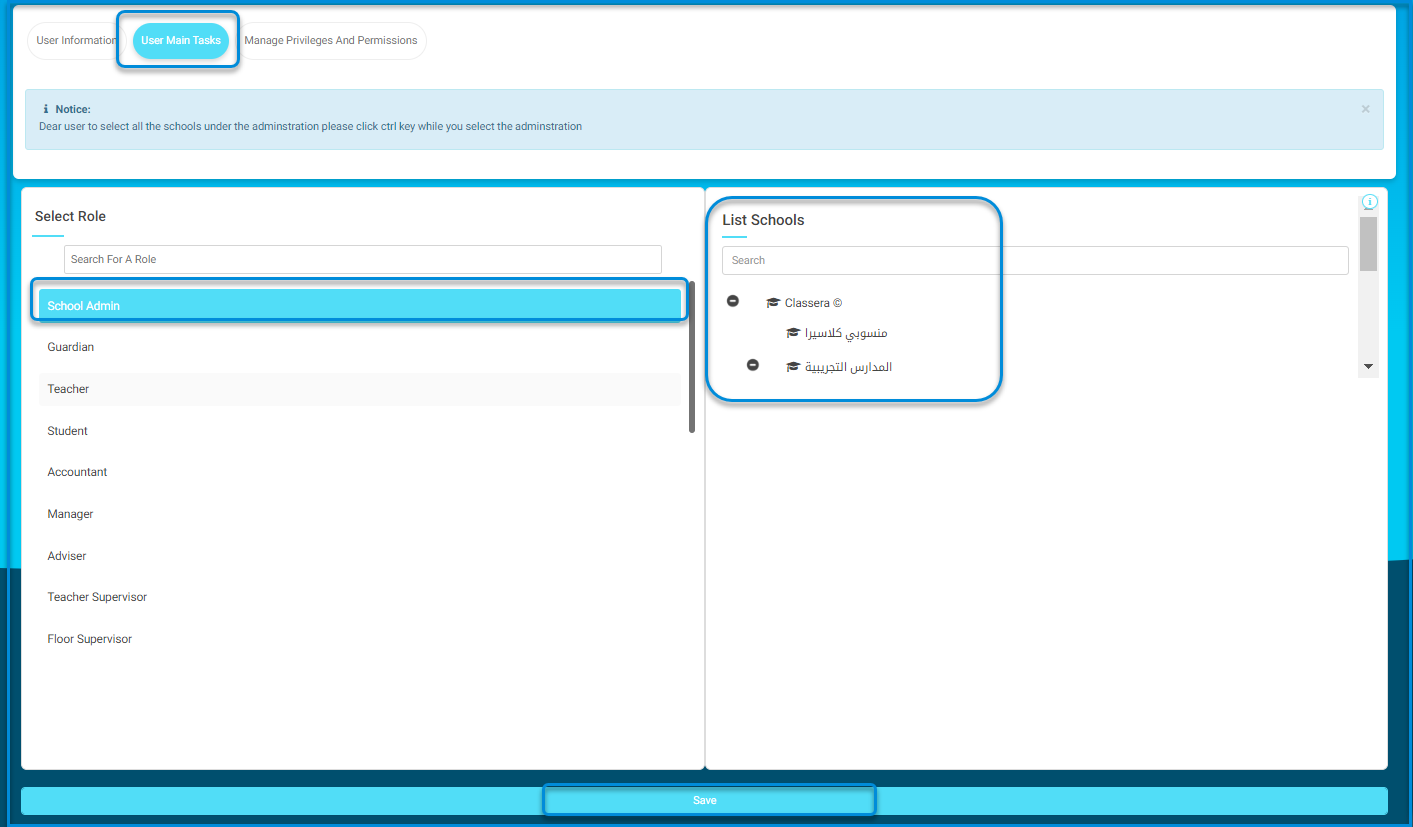
Note: To select all the schools under the administration please click ctrl key while you select the administration.


