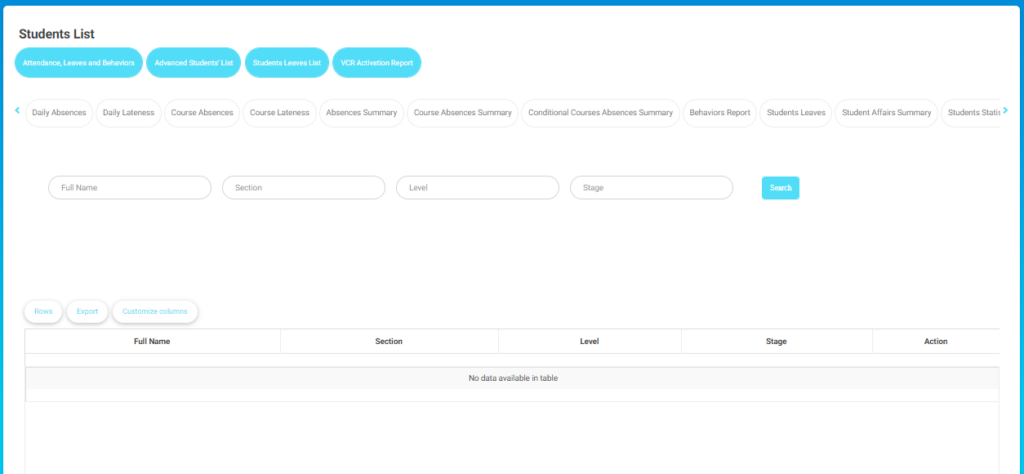
The Students List screen gives the floor supervisor access to the attendance leaves behavior, advanced students’ list, students leaves list, and the VCR Activation Report.

The following steps guide you to interact with the screen, from filtering data to exporting and customizing the table view.
- Click on any of these buttons to access specific student lists or reports: Attendance, Leaves and Behaviors, Advanced Students’ List, Students Leaves List, VCR Activation Report.
- There are several filter buttons, such as Daily Absences, Daily Lateness, Course Absences, Course Lateness, and others. Click on any filter to refine your search by a specific category.
- Use the following input fields to narrow down your search:
- Full Name: Enter the student’s name.
- Section: Type the section.
- Level: Specify the level.
- Stage: Enter the stage.
- Once you’ve entered the relevant details, click Search to view the results.
- The table below the search area will display the results (e.g., Full Name, Section, Level, Stage, Action).
- Use the Rows button to adjust the number of rows displayed in the table.
- Press Export to export the table data.
- Click Customize columns to adjust the columns shown in the table.
Attendance Leaves Behavior #
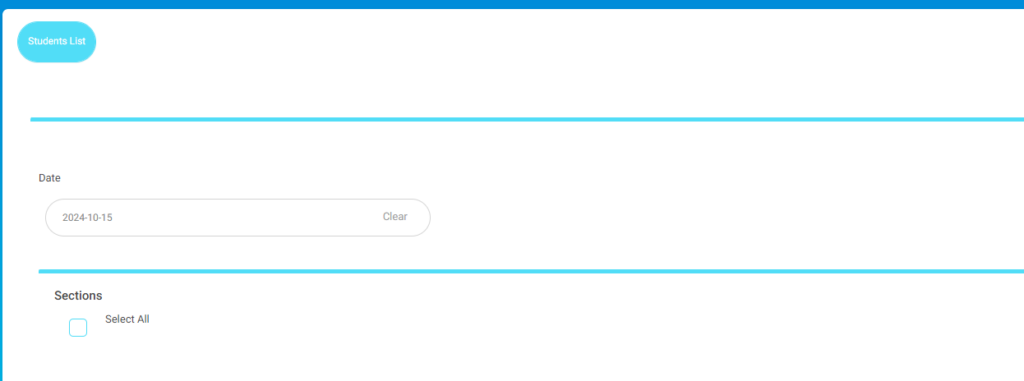
The following steps explain how to interact with the filters on this screen to narrow down the student list by date or section.

- Click the Attendance Leaves Behavior tab from the Students List screen.
- Use the Date field to select a specific date by clicking on the date input box.
- To clear the selected date, click Clear.
- Check the Sections box next to Select All to select all sections or individually select sections as needed.
- Click the Students List button to return to the main student list screen.
Advanced Students’ List #
The following steps explain how to filter, search, and manage student leave information using this advanced students’ list.

- Click the Send Notifications for Selected Students to Update FaceID button to send notifications to students who need to update their FaceID.
- Use the following input fields to filter your search:
- Level: Enter the student’s level.
- Section: Input the student’s section.
- Student ID: Type the student’s ID.
- Student Name: Enter the student’s name.
- Click Search after filling in the required fields to display the relevant data in the table below.
- Click the Advanced Search button to access additional search options.
- Use the Rows button to adjust the number of rows displayed.
- Click Export to export the data.
- Press Customize columns to adjust which columns are shown.
Students Leaves List #
The following steps explain how to filter, search, and manage student leave information using the Students’ Leave List tab.

- Use the following input fields to filter your search: Full Name, Section, Level, Stage, Action.
- Click Search after filling in the search fields to display relevant leave records in the table below.
- Click the Advanced Search button for additional search options:
- Use the Rows button to adjust the number of rows displayed.
- Click Export to export the data.
- Press Customize columns to adjust which columns are shown.
VCR Activation Report #
These steps guide you on how to search for and manage VCR activation reports.

The table resulting from this search shows data such as input name, VCR created, VCR attended, and activation percentage.
- Use the following input fields to filter your search:Name:
- Name: Enter the name of the individual you are searching for.
- From: input the start date of the search range.
- To: input the end date of the search range.
- Click Search after entering the required search details to display the relevant VCR activation data in the table below.
- Below the search area, you can interact with the data table:
- Export All to Excel: Click this button to export the entire table to an Excel file.
- Rows: Use this button to adjust the number of rows displayed in the table.
- Export: Press this button to export the visible data.
- Customize columns: Use this to adjust the columns shown in the table.


